
Trusted by 155+ Homeowners
Ceiling Water Damage: Drywall Repair Guide
- Over 157 5-Star Reviews
- Free Estimates and Quotes
- 100% Satisfaction Guaranteed
- Child, Family & Pet Safe Steps
- 24-Hour Emergency Service
- Fully Licensed & Insured
Ceiling water damage can be a messy surprise, often requiring drywall repair to restore your home’s appearance and integrity.
Addressing drywall repair for ceiling water damage promptly is key to preventing further issues like mold growth and structural weakening.
TL;DR:
- Ceiling water damage often starts with leaks from above, affecting drywall.
- Signs include stains, sagging, and peeling paint.
- Small damage might be DIY-able, but larger issues need professional help.
- Repair involves drying, patching, texturing, and painting.
- Ignoring ceiling water damage can lead to mold and structural problems.
Ceiling Water Damage: Drywall Repair Guide
Discovering water stains or sagging on your ceiling can be unnerving. This often signals ceiling water damage, a common problem that affects your home’s drywall. Understanding the repair process is key to getting your home back to normal.
What Causes Ceiling Water Damage?
Most ceiling water damage originates from leaks in the room directly above. This could be a leaky pipe, a malfunctioning appliance like a washing machine or dishwasher, or even a roof leak. Sometimes, condensation from HVAC systems can also cause moisture issues.
Signs You Have Ceiling Water Damage
Look out for several tell-tale signs. These include:
- Discolored stains that are often yellow or brown.
- Sagging drywall, which indicates water saturation.
- Peeling paint or wallpaper where moisture has seeped in.
- A musty odor, which can signal mold growth.
- Dripping water, the most obvious sign.
Can You Repair Ceiling Water Damage Yourself?
For very minor stains on intact drywall, you might be able to spot-treat. However, if the drywall is sagging, soft, or shows signs of mold, it’s best to seek professional help. DIY repairs on severely damaged areas can lead to bigger problems down the line. You might think you’re saving money, but why DIY water damage cleanup often backfires is a common concern.
The Drywall Repair Process Explained
When you have significant ceiling water damage, a structured approach is necessary. This ensures all moisture is removed and the drywall is properly repaired.
Step 1: Identify and Stop the Source
Before any repairs begin, the most critical step is to find and fix the source of the leak. If you don’t stop the water intrusion, any repair work will be undone. This might involve fixing a pipe, repairing a roof, or addressing appliance issues.
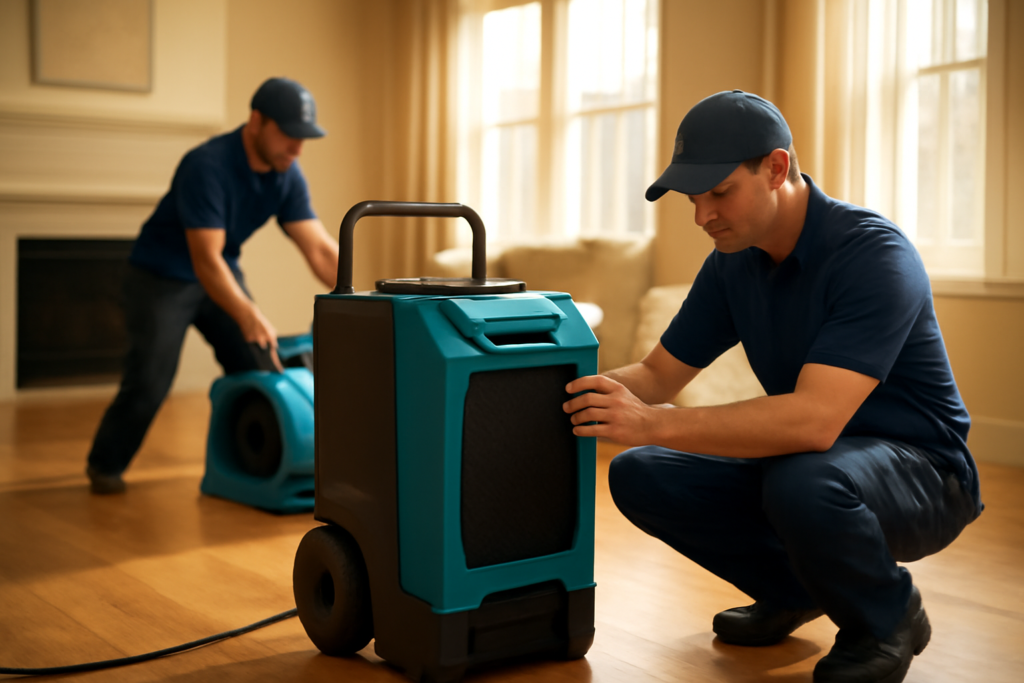
Step 2: Thorough Drying
The area must be completely dry before repairs can start. This is where professional help shines. Experts use specialized equipment like industrial air movers and dehumidifiers to speed up the drying process and prevent hidden moisture. Learning how pros dry out a flooded home: step by step can highlight the thoroughness involved.
Step 3: Assess the Damage and Remove Damaged Materials
Once dry, assess the extent of the damage. If the drywall is stained but solid, it might be cleanable and paintable. However, if it’s soft, crumbling, or moldy, it needs to be cut out and replaced. This is a key part of the water damage restoration steps: a complete guide.
Step 4: Patching and Replacing Drywall
Small holes or cracks can be patched with joint compound and tape. For larger sections, new pieces of drywall will be cut and installed. This creates a smooth surface for finishing.
Step 5: Texturing and Priming
After the new drywall is in place and the compound is dry, the area is textured to match the rest of your ceiling. This step is vital for a seamless look. Then, a quality primer is applied to seal the surface and prevent future stains from bleeding through.
Step 6: Painting
Finally, the repaired area is painted to match the existing ceiling color. This brings your ceiling back to its original condition.
When to Call a Professional
You should always call a professional if:
- The water damage is extensive.
- The drywall is sagging or soft.
- You suspect mold growth.
- You can’t find or fix the source of the leak.
- You’re uncomfortable with DIY repairs.
Professionals have the tools and expertise to handle the job safely and effectively. They understand the full scope of what happens during a water damage restoration.
The Importance of Prompt Action
Addressing ceiling water damage quickly is crucial. Delaying repairs can lead to:
- Mold growth, which poses serious health risks.
- Structural damage to your ceiling joists and the building’s frame.
- Increased repair costs as the damage spreads.
Acting fast can save you money and prevent many headaches. It’s always better to act before it gets worse.
Understanding Repair Costs
The how much does water damage restoration really cost? can vary widely. Factors include the size of the damaged area, the severity of the water damage, and whether mold remediation is needed. Getting an estimate from a professional is the best way to understand the potential expenses.
Preventing Future Ceiling Water Damage
Regular home maintenance can help prevent future issues. This includes:
- Checking for roof leaks periodically.
- Inspecting plumbing for leaks, especially around bathrooms and kitchens.
- Ensuring appliances with water connections are in good working order.
- Maintaining proper attic ventilation to prevent condensation.
These simple checks can save you from dealing with costly repairs.
Conclusion
Ceiling water damage and subsequent drywall repair are manageable with the right approach. While minor issues might be DIY-friendly, extensive damage or signs of mold demand professional attention. If you’re facing ceiling water damage in Eden Prairie, remember that the team at Eden Prairie Restoration Pros is a trusted resource ready to help you navigate the restoration process, ensuring your home is safe and sound again.
What are the first signs of ceiling water damage?
The most common signs include visible water stains, often appearing as yellow or brown splotches on the ceiling. You might also notice peeling paint, bubbling wallpaper, or a sagging appearance of the drywall itself.
Can a small water stain on the ceiling be painted over?
If the stain is superficial, the drywall is completely dry and firm, and there’s no sign of mold, you might be able to paint over it. However, it’s crucial to use a stain-blocking primer first to prevent the stain from reappearing through the new paint.
How long does it take for drywall to dry after water damage?
The drying time varies greatly depending on the extent of the water saturation, humidity levels, and airflow. It can range from a few days to several weeks. Professionals use specialized equipment to speed up this process significantly.
Is it safe to be in a room with a sagging ceiling?
No, it is generally not safe to be in a room with a sagging ceiling. A sagging ceiling indicates that the drywall is heavily saturated with water and is losing its structural integrity. It could collapse at any moment, posing a serious safety hazard.
What is the difference between water damage and mold damage?
Water damage is the initial effect of water intrusion on materials. Mold damage occurs when mold spores, present in the environment, find moisture and begin to grow on damp surfaces. Mold typically appears as fuzzy or slimy patches and can cause health problems and further material degradation.

Levi Lemieux is a licensed Damage Restoration Expert with more than 20 years of hands-on experience in disaster recovery and structural mitigation. As a seasoned industry authority, Levi has dedicated two decades to mastering the technical complexities of environmental safety, providing property owners with the reliable expertise and steady leadership required to navigate high-stress property losses with absolute confidence.
𝗖𝗲𝗿𝘁𝗶𝗳𝗶𝗰𝗮𝘁𝗶𝗼𝗻𝘀: Levi holds elite IICRC credentials, including Water Damage Restoration (WRT), Applied Structural Drying (ASD), Mold Remediation (AMRT), Fire and Smoke Restoration (FSRT), and Odor Control (OCT).
𝗙𝗮𝘃𝗼𝗿𝗶𝘁𝗲 𝗣𝗮𝘀𝘁𝗶𝗺𝗲: When off-site, Levi is a passionate mountain biker and an amateur astronomer, hobbies that reflect the endurance and precision he brings to every restoration project.
𝗕𝗲𝘀𝘁 𝗣𝗮𝗿𝘁 𝗼𝗳 𝘁𝗵𝗲 𝗷𝗼𝗯: He finds the most fulfillment in providing a clear path forward for families, turning a site of devastation back into a safe, comfortable home.